The inference to a magic wand is on purpose. The Wand is truly a wide range effect.
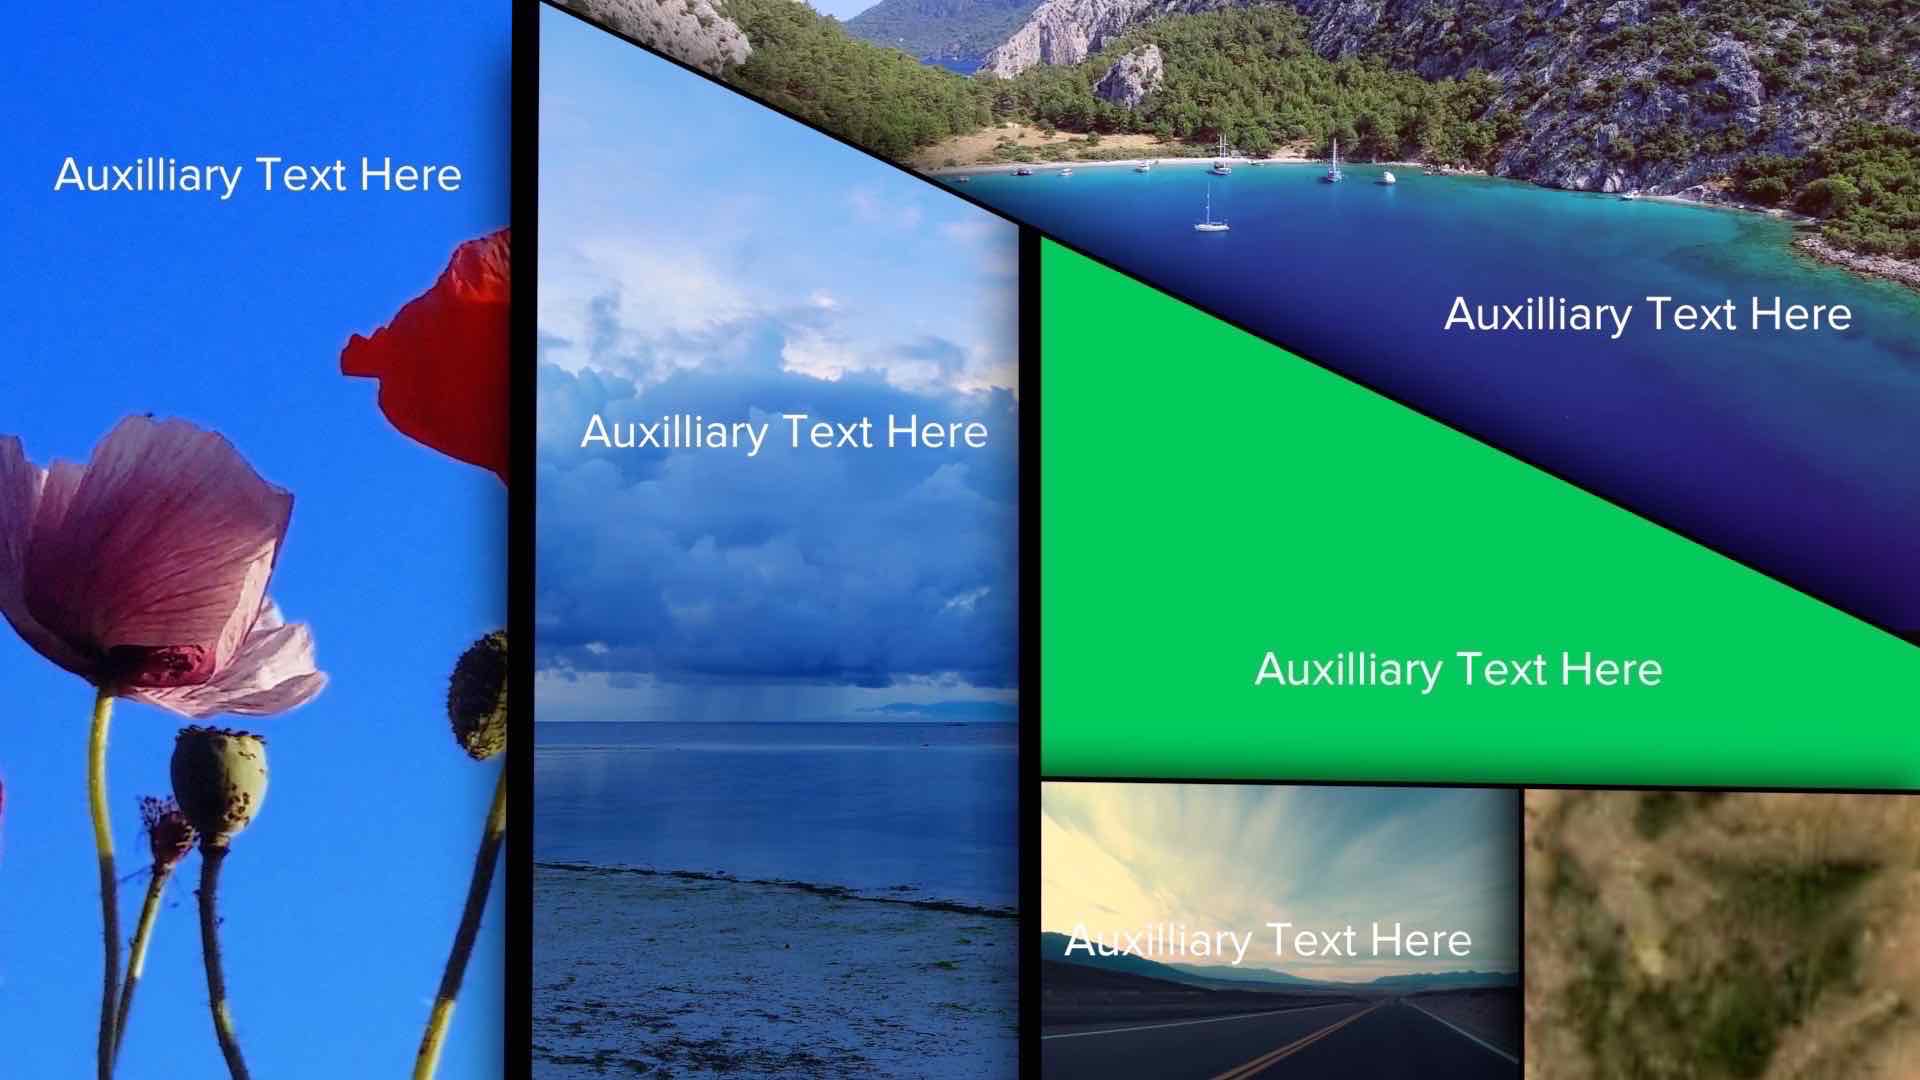
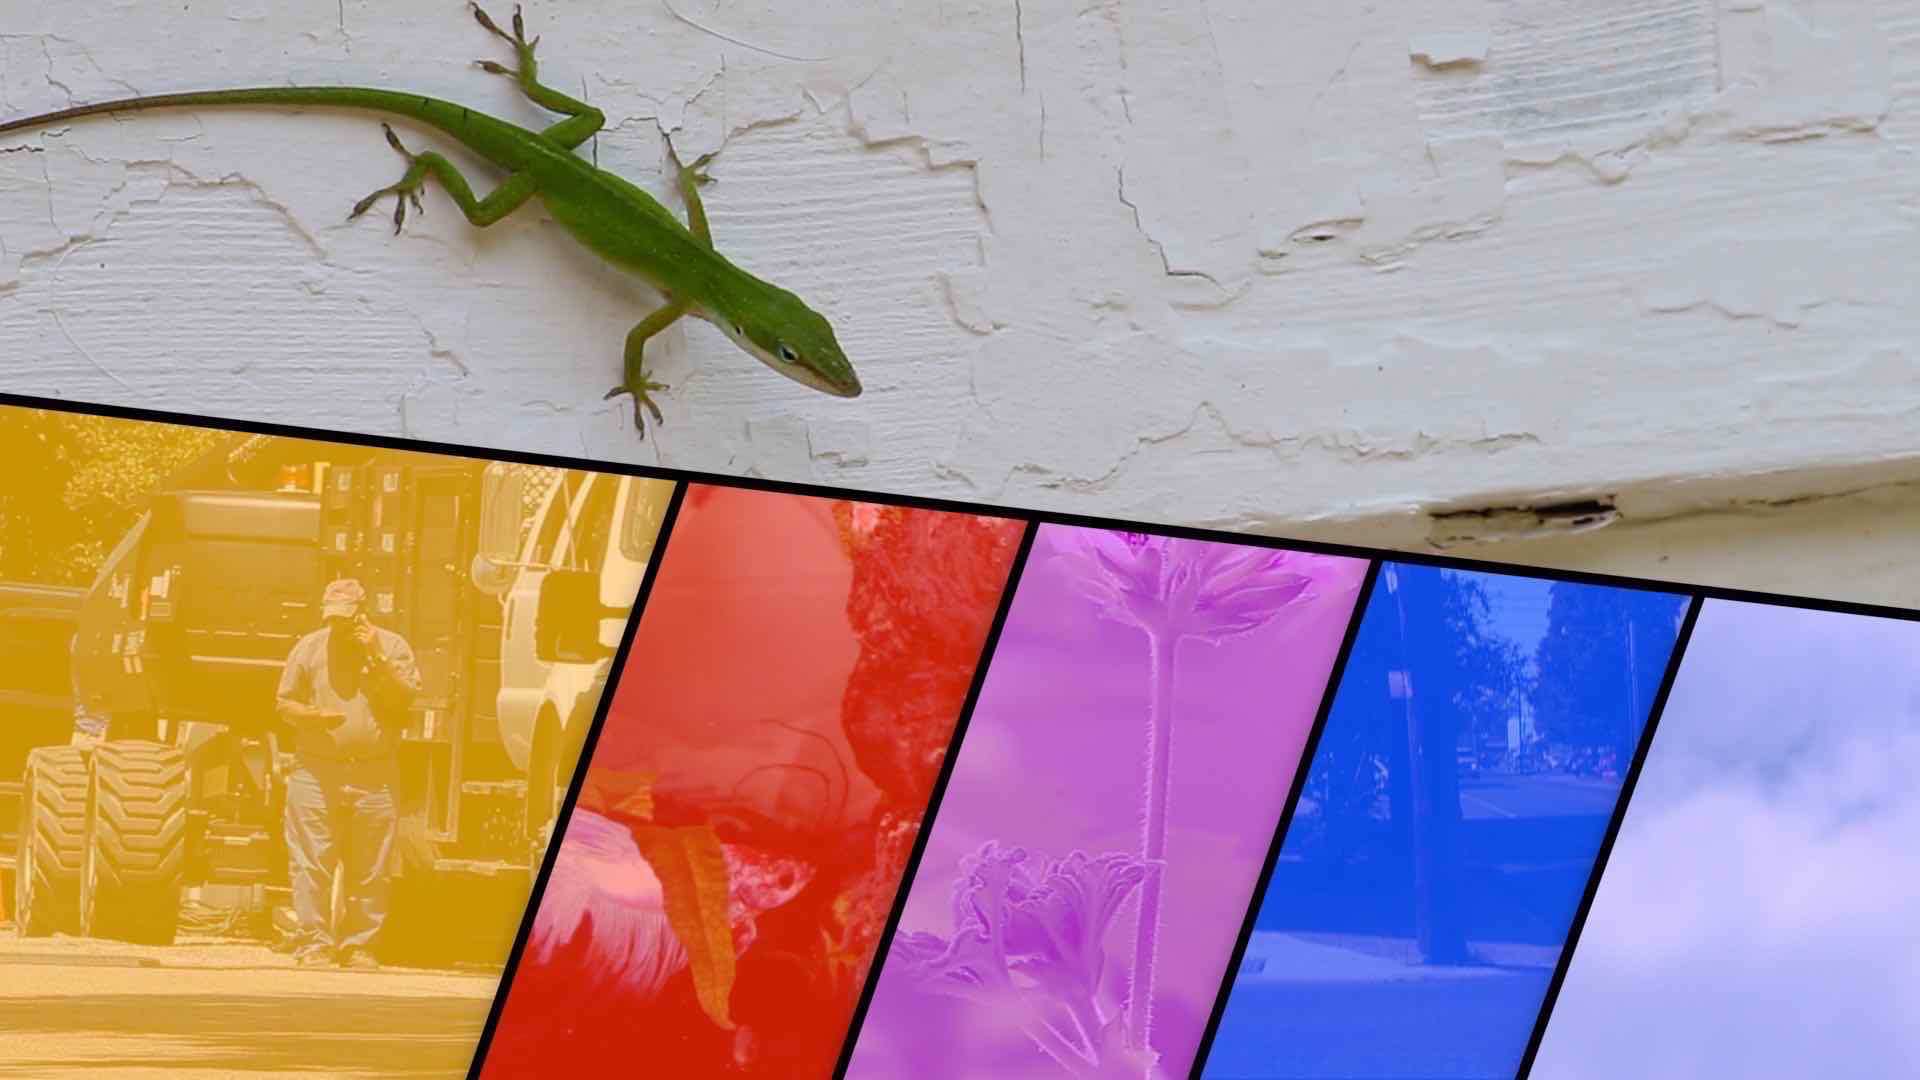
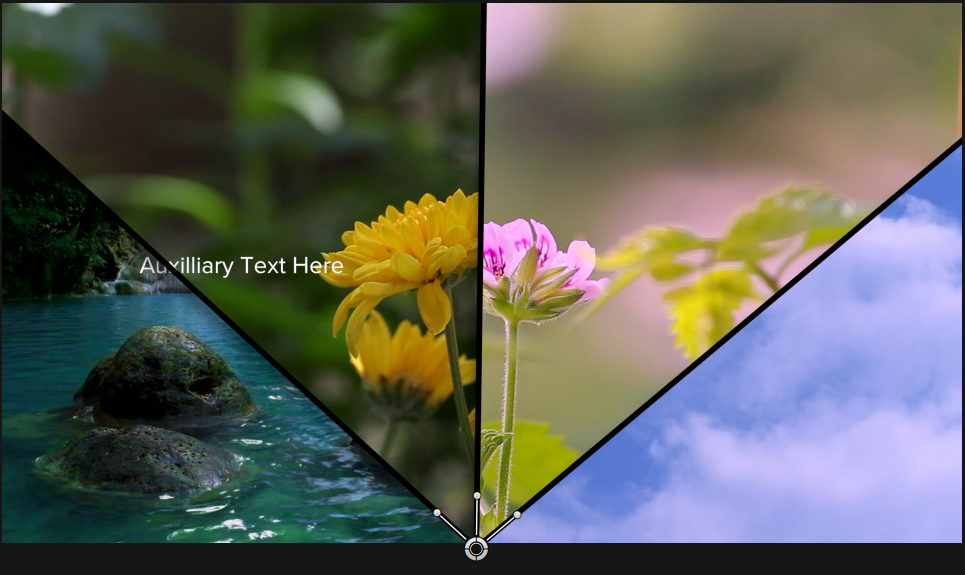
On the surface, The Wand looks like the simple divider it is. The scene is divided between the storyline and a background with “auxiliary text”. Animating the divider across the text creates a text reveal. There is a built in Drop Zone behind the background (revealed by lowering the color solid opacity) creating a split screen effect with built in text. With the split screen effect and animating the divider, this template is turned into a “wipe” transition. Animating positioning and rotation of the divider, very interesting and complex wipe effects are easily accomplished!
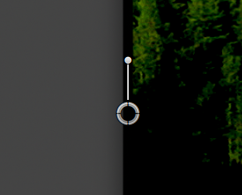
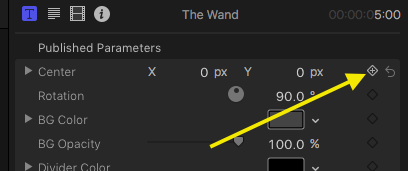
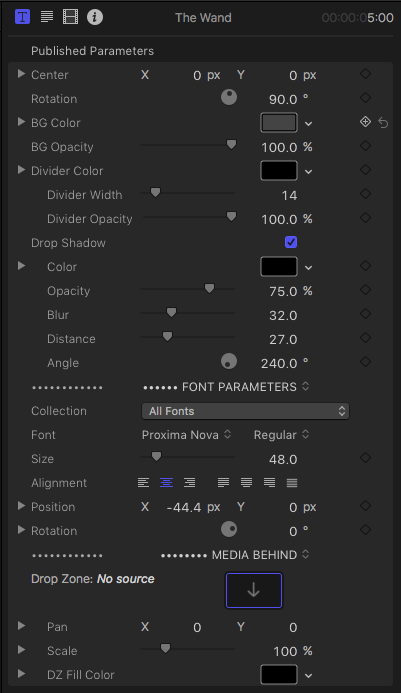
There is an OSC with a “post”. The OSC controls a line. The post controls the angle of the line. The line divides the scene into whatever is below the title clip down to the storyline and either a solid color background or a drop zone for any other kind of media (or both with opacity on the solid color). On the solid color/drop zone side, there is a text object which can be used as a text reveal title, or hidden (recommended to change the text to just a few space characters so as not to lose the text bounding box).
That’s it.
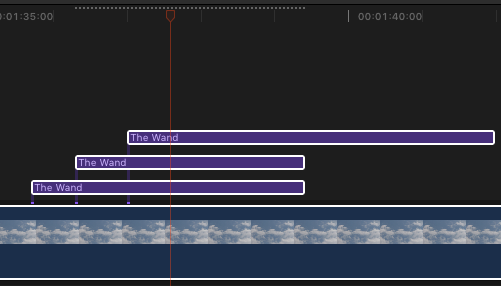
That’s not it. Since this is a title template, and titles accumulate whatever is underneath them, it is possible to stack a number of “instances” of The Wand to create custom multidivider effects. Since this title contains a drop zone for a background, it can be used as a split screen. Since it is “stackable”, it can be used to create multi-split scenes (keep reading!)
The default divider is black and 12000 pixels long. This title will work on up to 5K (and possibly 8K) video. [Tested on 4K.] The OSC is *always* at the center of the line. The line rotates around this point. Drag the post around to set the angle of the dividing line. The rotational span values go from -720° to +720° giving you a maximum of four complete revolutions of keyframed animation (only if you start at one end of the 720 range and go to the other). Since the default orientation of the divider is 90° (vertical), that will limit the number of complete revolutions to three, in general. Most of the time, you will probably only be concerned with intervals of 180° of movement.
When the title clip is selected, the auxiliary text is selectable as well. You can use a mouse to move the text around on the screen to where you need it positioned, even if the text is obscured by the “foreground” side of the divide. You do, however, have to mouse over its region (a bounding box will appear).
This is the OSC (OnScreen Control)
Text can be animated as well. There are position and rotation controls in the FONT PARAMETERS section for your keyframing needs.
Below is a few examples to get you started and see the demo video below.
Example Uses:
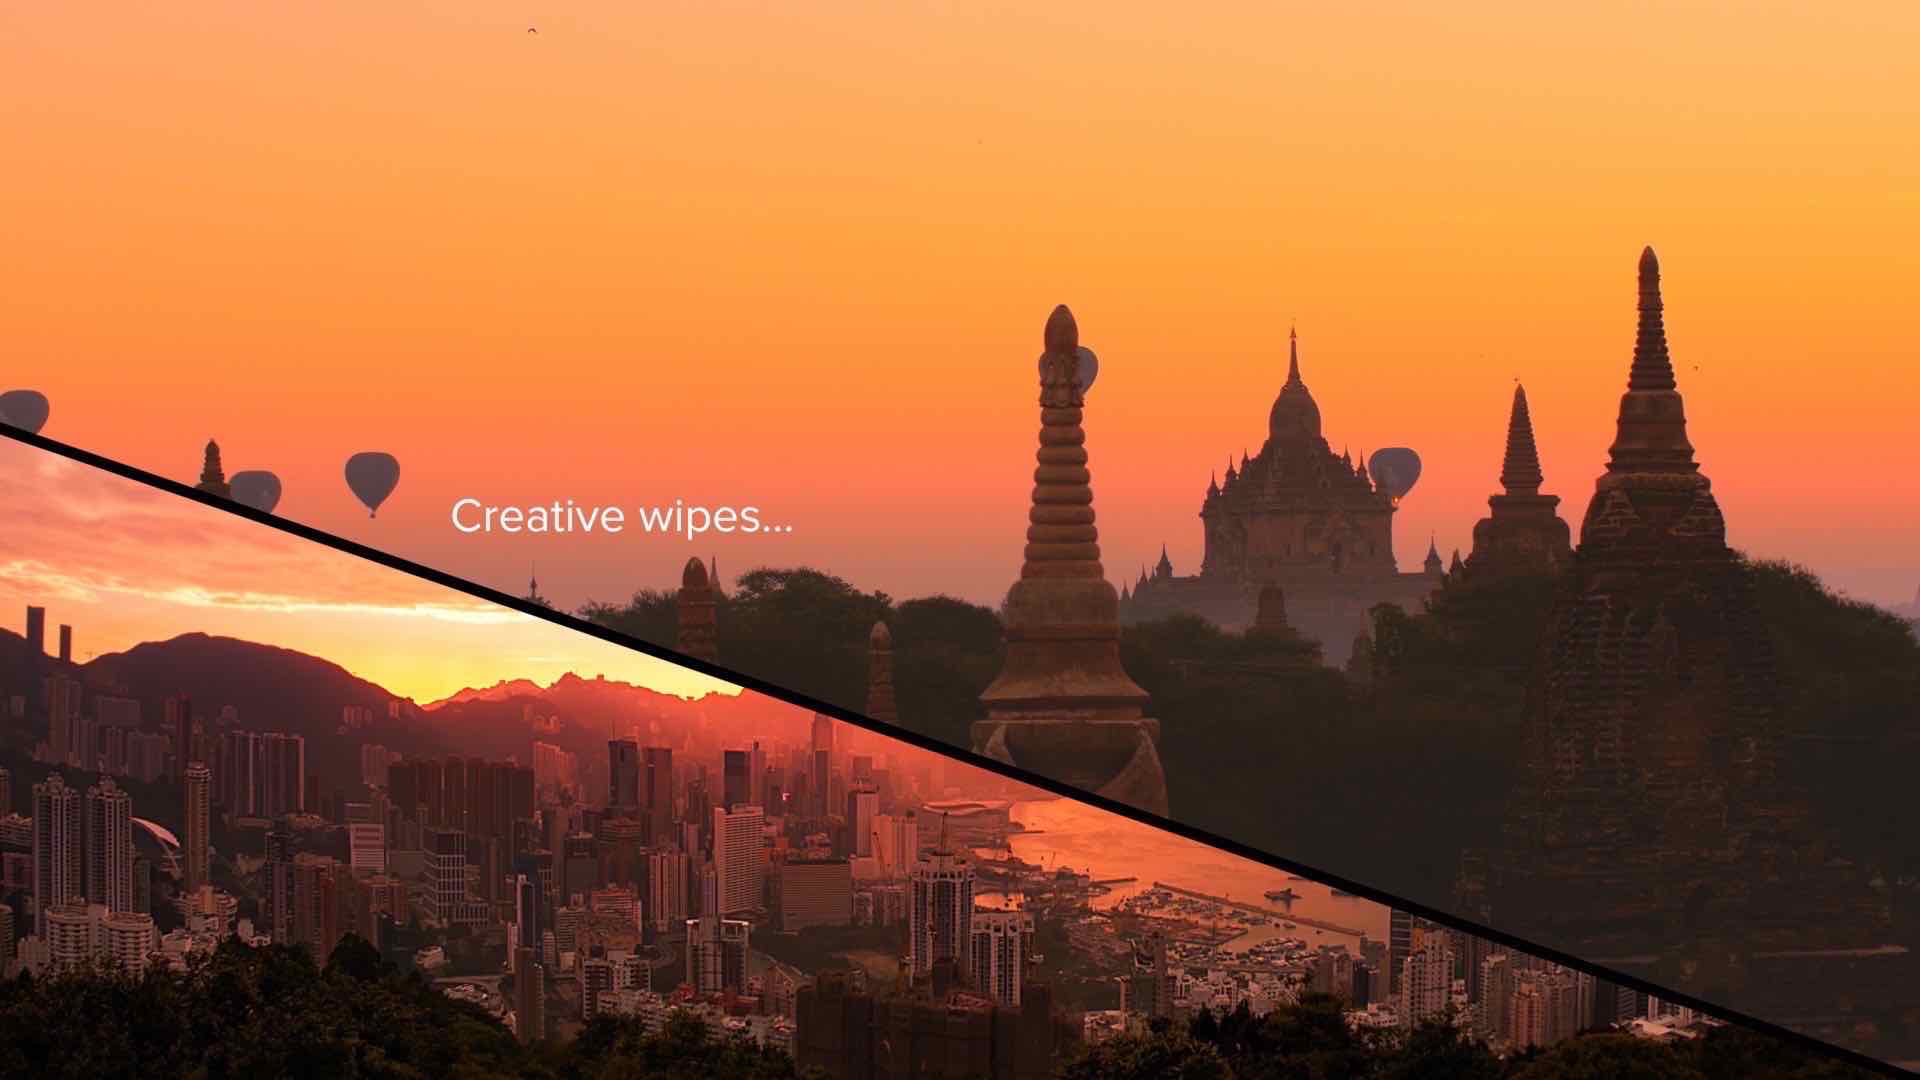
Full frame wipe
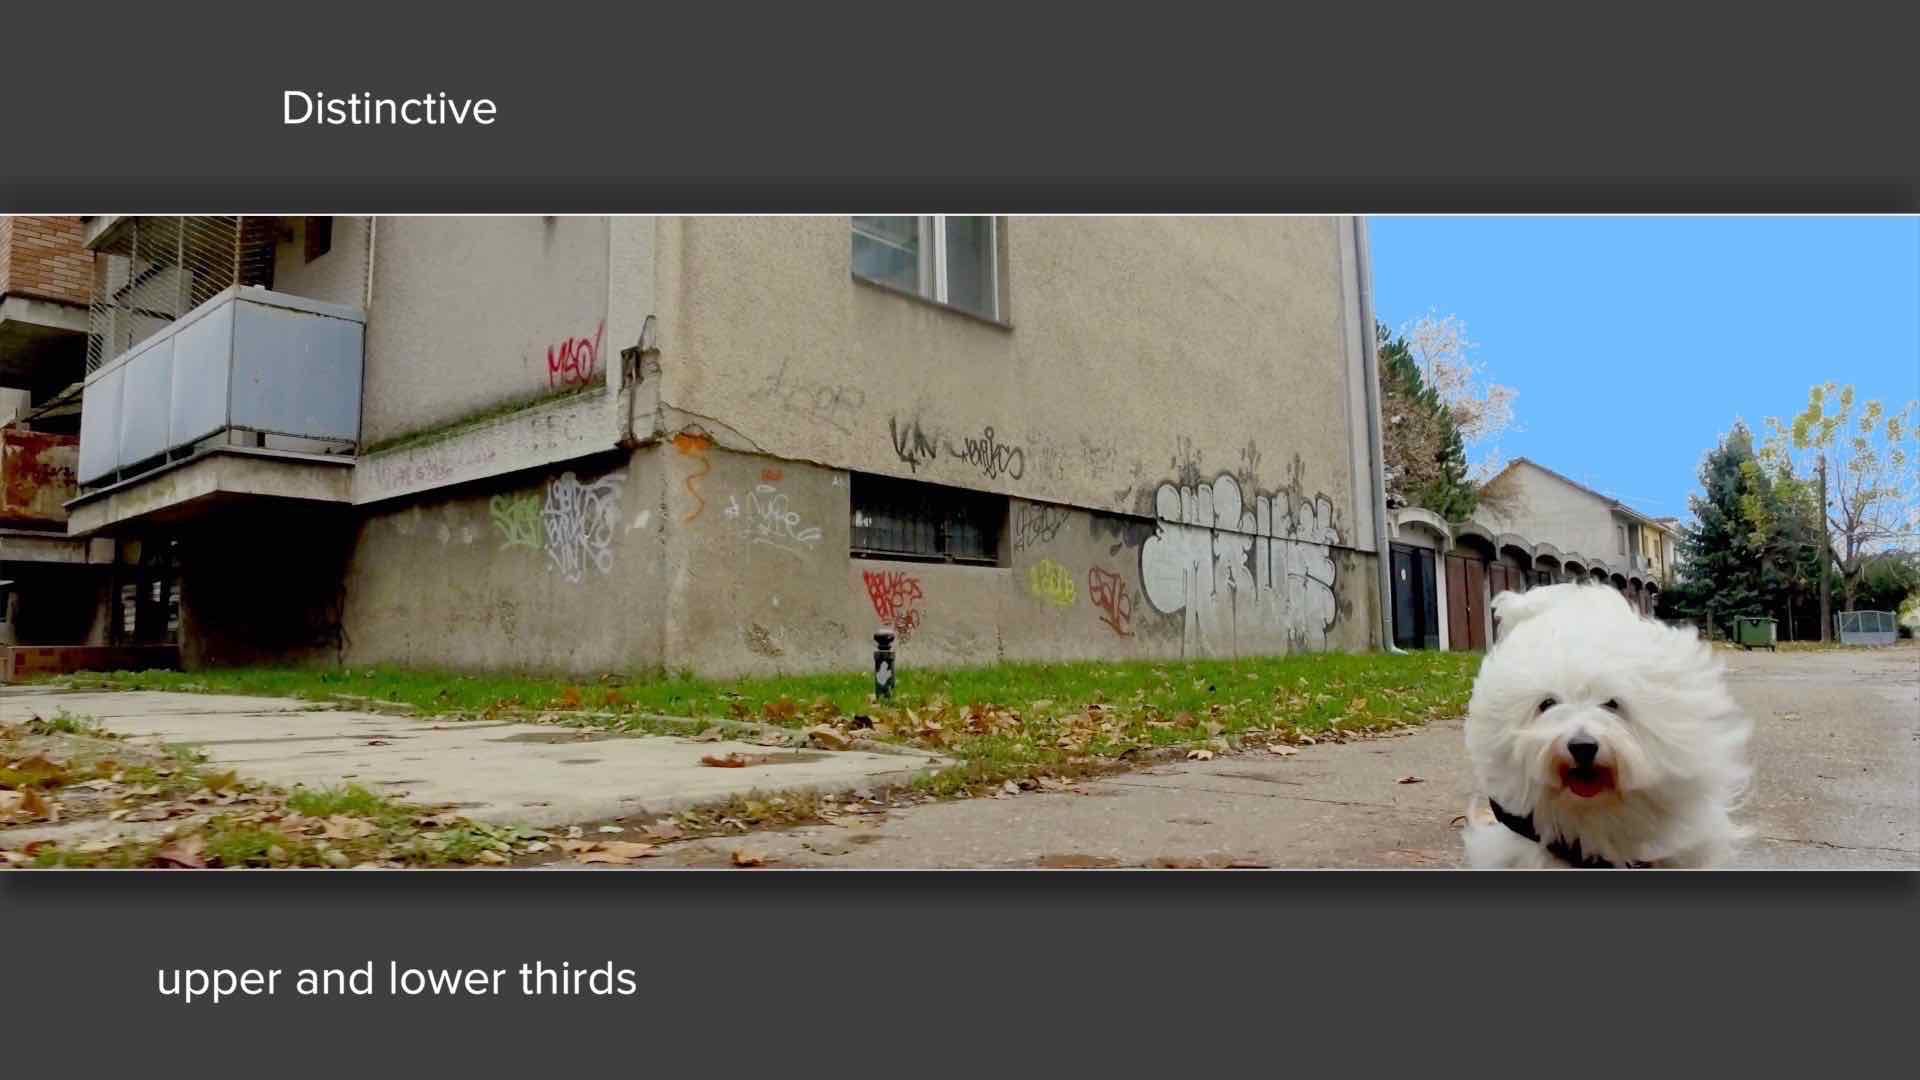
Upper and Lower Thirds
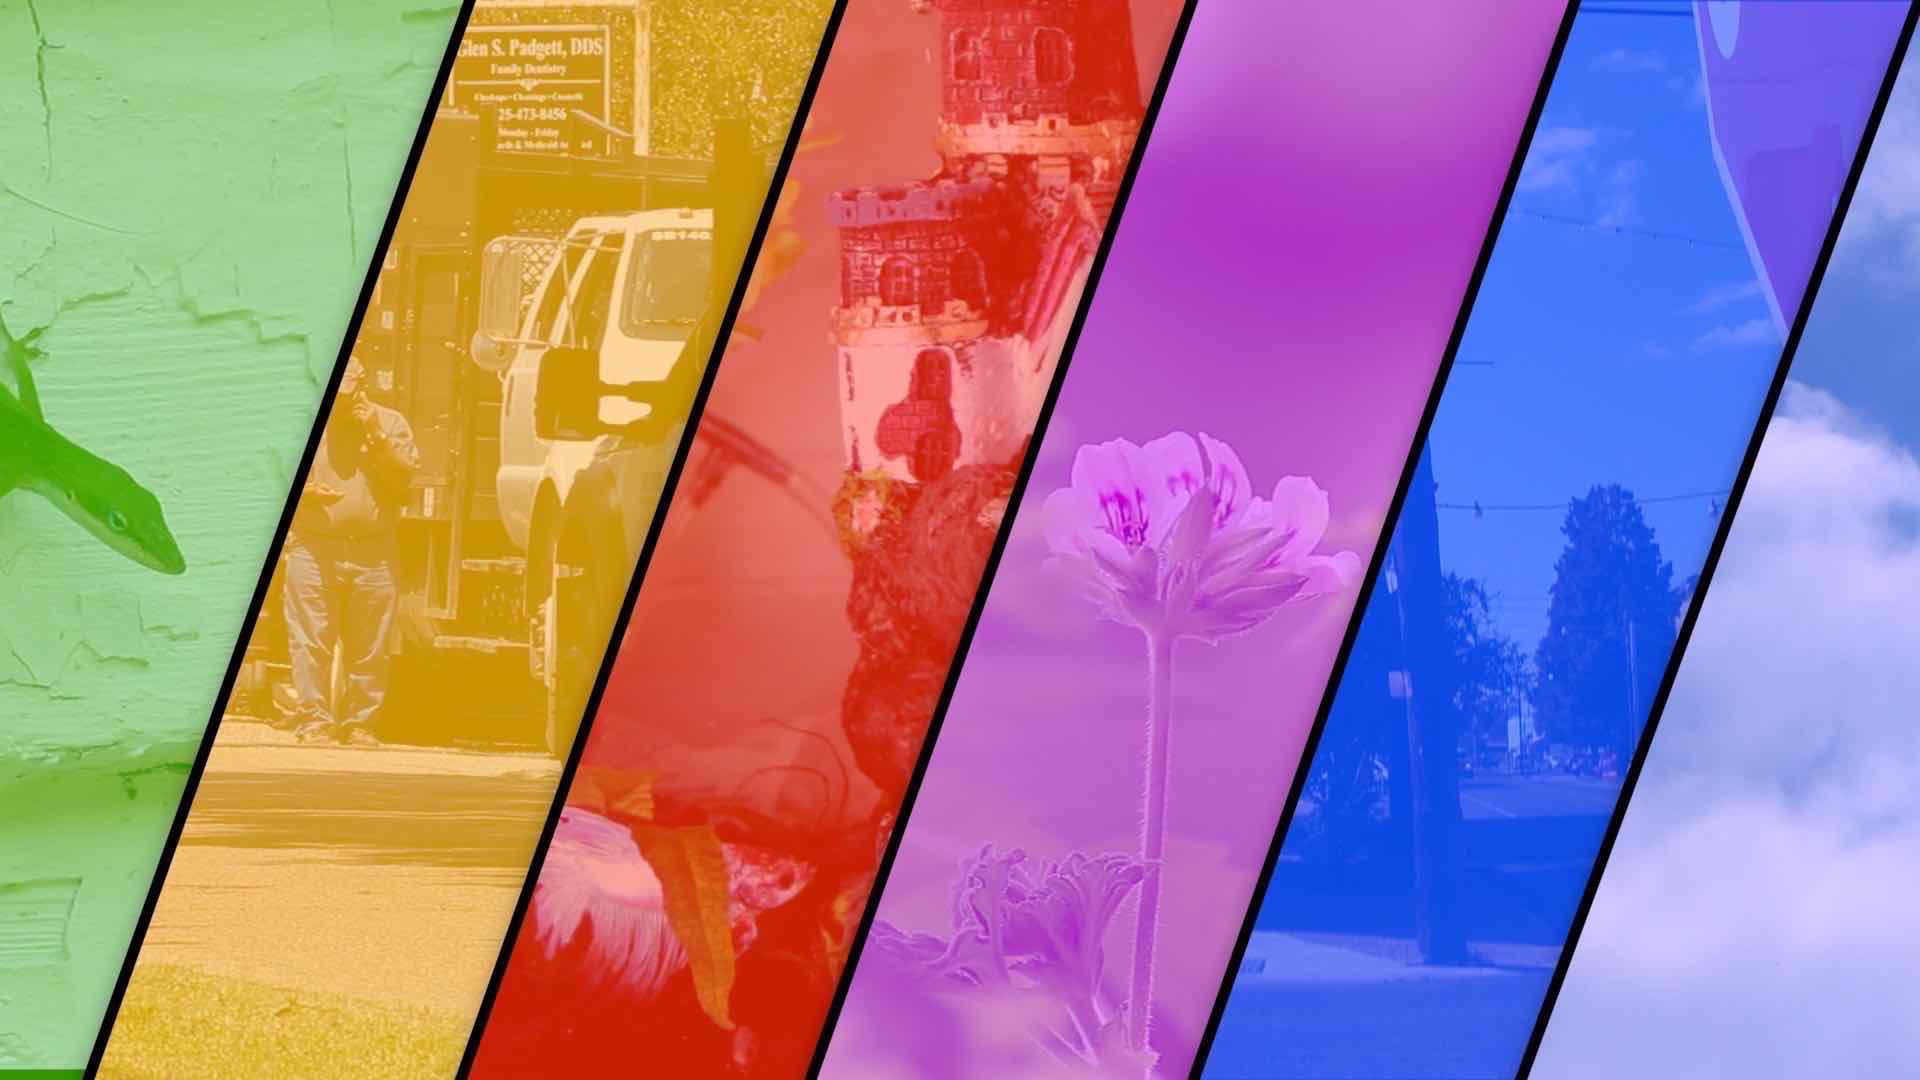
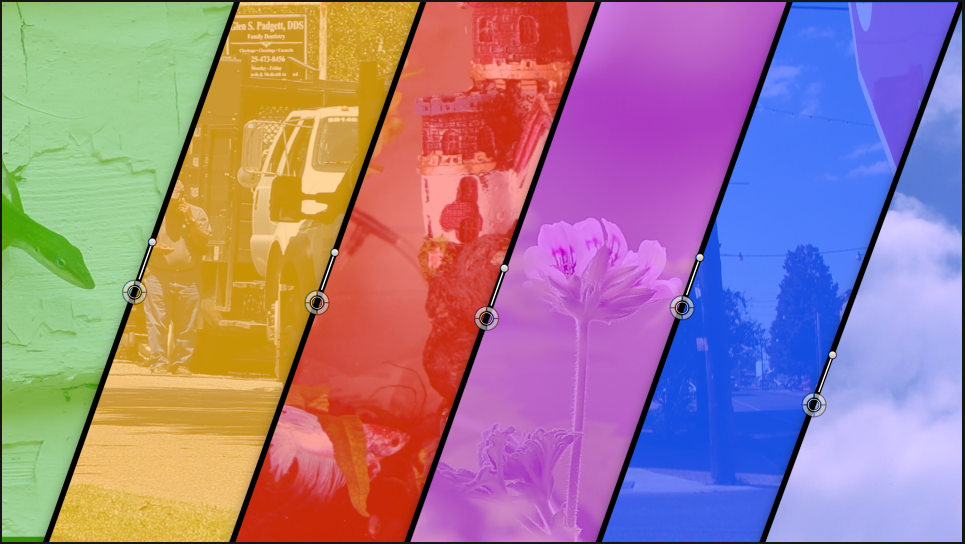
Creative Stacking
Customize Wand Orientation
Artistic Arrangements — Keep one or more sections solid colors
Creative Alternative to the above
A clock wipe is easily accomplished by placing the OSC center along the edge of the video and rotating the line across the scene.
Animating The Wand to create a text reveal
When mousing over a parameter that can be animated, a keyframe mark appears. Every parameter that shows the mark when mousing over it can be keyframed (that includes colors!)
Clicking on the keyframe mark will cause it to become filled (a solid diamond shape). You can set a keyframe and make changes to the parameter or vice versa. The order does not matter.
Once set, all that needs to be done is to move the playhead to another point in time then update that parameter to whatever new setting is needed. Final Cut will interpolate values between the two keyframed values and the animation is executed. This template will often require keyframing if any movement is required. You’ve been given total control over how this template operates. If you need any further help with keyframing, there are many free tutorials available on YouTube or Vimeo.
Keyframing is easy and you will rock this template!
Set up The Wand to the “still” position you want the animation to pause.
Move the playhead to about 15 or so frames from the beginning and set a keyframe. Move the playhead to about 15 frames from the end and set another keyframe. Move the playhead to the beginning and move the divider just off the screen. Move the playhead to the end and move the divider to its end position. Play.
Solid color backgrounds can be any color you like and with opacity turned down, used to color cast the drop zone media behind.
To easily create an effect like the Slanted orientation example above, set the initial angle of a first title instance, then Option-drag a copy over the original. Use the OSC to slide the divider to a new position.
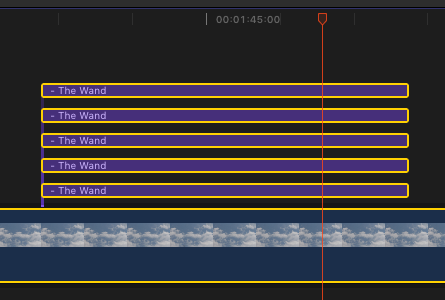
To line up multiple copies like this, multi select all of the titles used at once.
This will turn on all of the OSCs at once and you can fine tune the lineup (and you can also “do the math” and use the published position parameters for more accuracy). Dragging the OSC center control will not change the angle of the divider line.
Simultaneously adjusting the alignments of multiple “The Wand” titles
Staggering the effect to wipe on three extra splits over time.